
by Amazon Latest Kindle unlike any Kindle before it. First of all, its 10.2-inch e-ink display is huge. Second, it now comes with a pen that you can use on Scribe’s screen to take notes, draw, or highlight text.
Amazon currently sells two different versions of Scribe, one bundled with basic penand another one that comes with a premium pen. There are also storage levels ranging from 16 GB to 32 GB to 64 GB. The basic pen doesn’t have any extras — put the tip on the screen and write. However, the premium pen has a shortcut button for quick actions like activating the highlight mode of the pen along with a dedicated eraser on the opposite end of the pen.
Also: How to turn your old device into an Amazon gift card
The Scribe offers a whole new way to use Kindle, and I’m here to show you how to get the most out of Kindle’s new note-taking features. Below you’ll find nine tips and tricks to help do just that.
How to create a notebook, adjust settings
To take notes, create a calendar, plan, or to-do list, you need to create a notebook. You can have as many notebooks as you want, as long as your device has memory for them.
To create a new notebook, wake up your Kindle and then tap the Notebook icon with the plus sign to the right of the search bar.
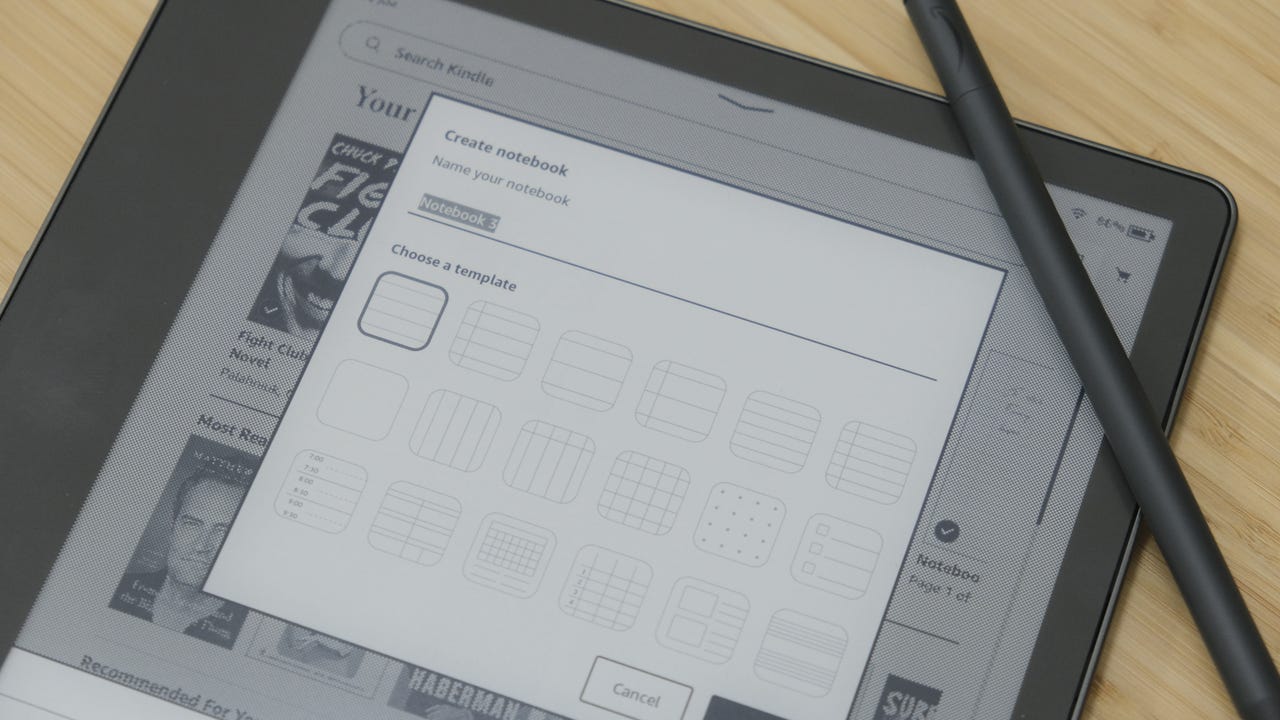
Immediately, you’ll be asked to name the notebook and see a grid of 18 different templates you can choose from.
After entering a name with the keyboard (unfortunately you can’t write it with a pen) and choosing a template, tap Create button.
If at any point in the future you decide you don’t like this template or you want to change the name of the notebook, tap near the top of the screen to display some options, then tap the Notebook icon (notice this time it has a device installed on it). You can enter a new name, change the template, and choose the behavior you want for the cover. Right now, your options are to use the first page of your notebook as the cover, or use the current page you’re viewing as the cover.
When you’re done adjusting the settings, tap the down arrow near the top of the pop-up to close the pop-up.
How to create more pages in a notebook
Once you’ve filled a page full of notes, you can create a second page by swiping — with your finger — from right to left across the screen, as if you were turning the page.
You’ll see a page number indicator in the bottom left corner of the screen. You can hide it by touching it, just like you can when reading a Kindle book.
Note — if you change the template for a notebook, it will change that template for the entire notebook, not the current page you’re on. As far as I can tell right now, there’s no way to use multiple templates in the same notebook.
Use the toolbar to change and control the pen’s behavior
You’ll notice a small round button with an up or down arrow on the screen whenever you’re in a notebook, document, or Kindle book. This is Scribe’s toolbar containing controls for the pen, highlighter, and eraser, plus a toggle to change between writing and touch modes, and undo/redo buttons.
To switch between different tools, tap the icon for each tool. For example, if you have a basic pen and need to erase something, tap the third icon from the top — the eraser — then use the pen to erase any wrong notes, then switch back to the pen.
Also: The best note taking tablet
There are additional controls for the pen, highlighter, and eraser when you tap its icon when that particular mode is active. For example, if you’re writing with a pen and want to adjust the “ink” thickness or thinness, tap the pen icon and then choose one of your options.
Same goes for highlighters. For the eraser, you can control the width of the eraser, and enable the selector to delete anything you choose, or you can erase the entire page and start over.
How to Customize the Pen’s Shortcut Button
The premium pen for note-takers has a shortcut button near the bottom of the pen. When you press and hold the button and then use the pen, the pen quickly changes its behavior, then changes back when you release the button.
I currently have the button set to act as an eraser so I don’t have to constantly flip the pen.
To change how the button on your premium pen works, select Than tab along the bottom of your Kindle and then tap Settings > Pen > Pen Shortcuts. Then select the behavior you want in the Keyboard Shortcuts section. Right now, the options are Highlighter, Pen, Eraser, or Sticky Notes.
What You Can Do With the Pen in Kindle Books
You may have had a weird look on your face when I mentioned sticky notes in the previous section. Yes, me too. But listen to Amazon.
When you’re viewing a Kindle book, you can create and leave sticky notes in the book with the pen. These notes can then be exported after you finish reading the book, so you have all your notes in one place.
If you don’t have a premium pen, you can use the sticky notes button on the toolbar to create notes, or if you have a premium pen and have the shortcut set to sticky notes, just hold the button, tap the tip of the pen pen on the page and the notes view is displayed.
How to get documents, PDF on Kindle Scribe
Just like the rest of the Kindle line, you can send your own documents and files to Scribe for future reading, highlighting, and note-taking.
There are several ways to get documents from your computer, phone, or tablet to Scribe. If you’re on a computer, you can use Amazon’s update Send to Kindle website where you can drag and drop documents and upload them to your kindle.
You can also send documents to Scribe from your phone or tablet using the share button and selecting the Kindle app as the destination.
Depending on the number and size of your documents, it may take a few minutes for them to sync to your Scribe. Once they’re available, you’ll see them on the Home tab.
You can mark up PDFs and sometimes sign documents
What you can do with the pen in terms of adding notes, highlighting, or adding sticky notes depends on the type of document you’re viewing. I find that images and Word documents are limited to sticky notes, while I can write, highlight, and do whatever I want in most PDF documents.
There have been a few PDFs that Scribe simply failed to open. They are not password protected, so I’m not really sure what the problem is.
How to access your Notebook on other devices
It’s simple: Install the Kindle app. That’s right, your Notebooks will sync across Amazon’s Kindle app, like placing them directly on your phone. You won’t be able to edit or add to your notes, but at least you’ll have access to them without a Note taker.
How to share a notebook or document
When you finish signing a document or have a notebook that you want to send to others, you can. Just know that what you send will arrive in PDF format.
To send a document or notebook, open it on your Kindle Scribe, tap near the top of the screen to see additional options, then tap the Share button. Your Amazon account’s email address will show up as the default option, or you can choose to enter a different email.
The recipient of the manual will receive a link to download a good PDF in 7 days.


