
Call of Duty: Modern Warfare 2Spec Ops co-op missions have tons of information to collect, and here we’ll guide you to each informational location to collect all 20 pieces from the Low Profile quest. These pieces of information are scattered around the map in the form of items like USBs, audio logs, and crates. Also, it should be noted that finding 20 intel items in Spec Ops will reward you with the full SSE Title/Achievement. There are 50 pieces of information in all three Spec Ops missions, but this is the easiest route to getting the 20 needed for Trophies/Achievement.
MW2 Spec Ops – all low profile intel locations
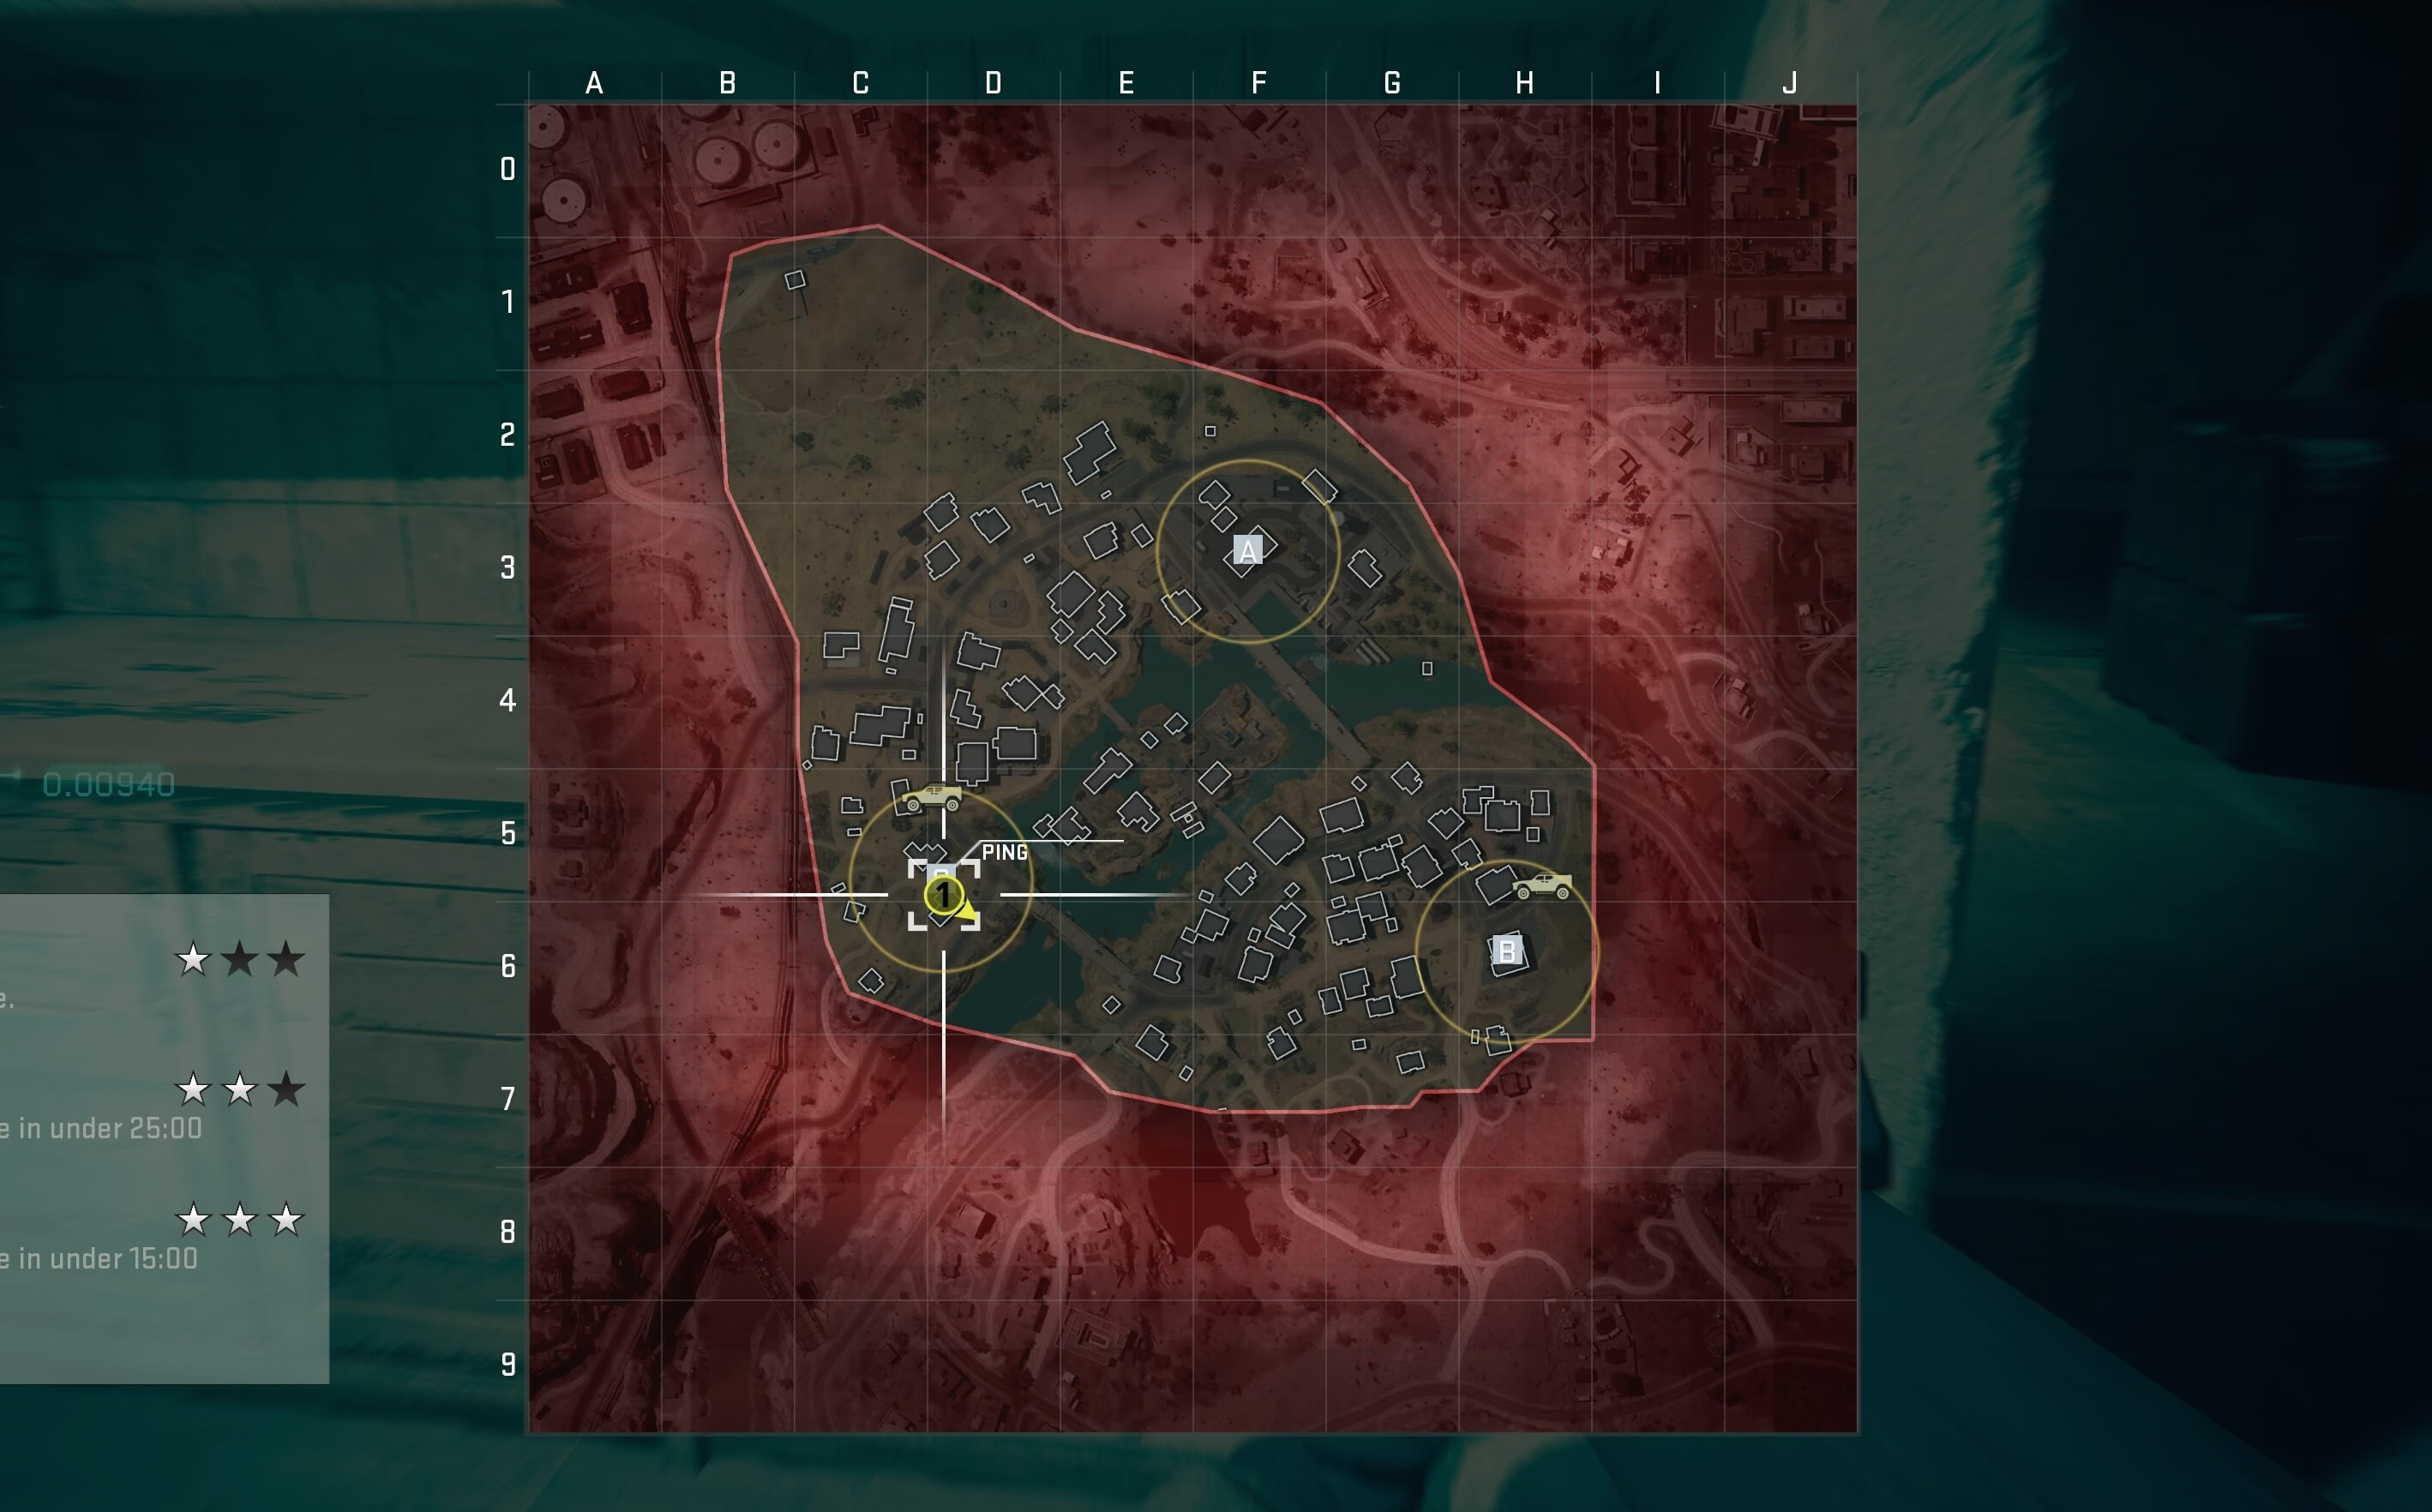
These pieces of information can be collected using stealth to move around the map, or you can dive into the blazing guns and just clear every spot as you move around. area. There is no time limit to complete the task, so use the method you prefer.
Information can be gathered in any order, but starting at B and working around the map to kill enemies with stealth is a great approach to avoid being overwhelmed. You can scroll down to the last information location in the list and choose whether you want to start from there to make it easier to get it, or if you want to collect it after killing all the enemies. It’s a bit complicated, so I’ve saved it for last.
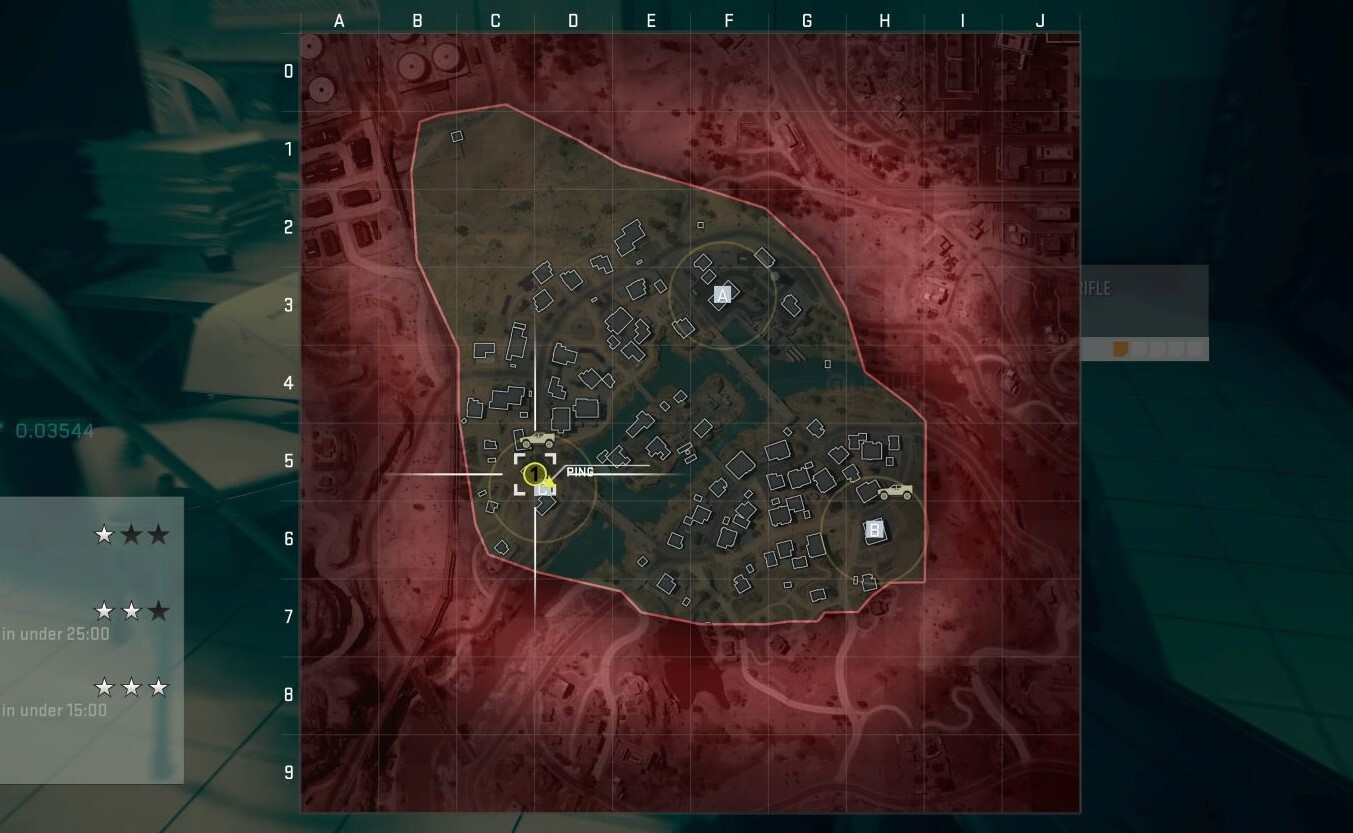
Intel #1

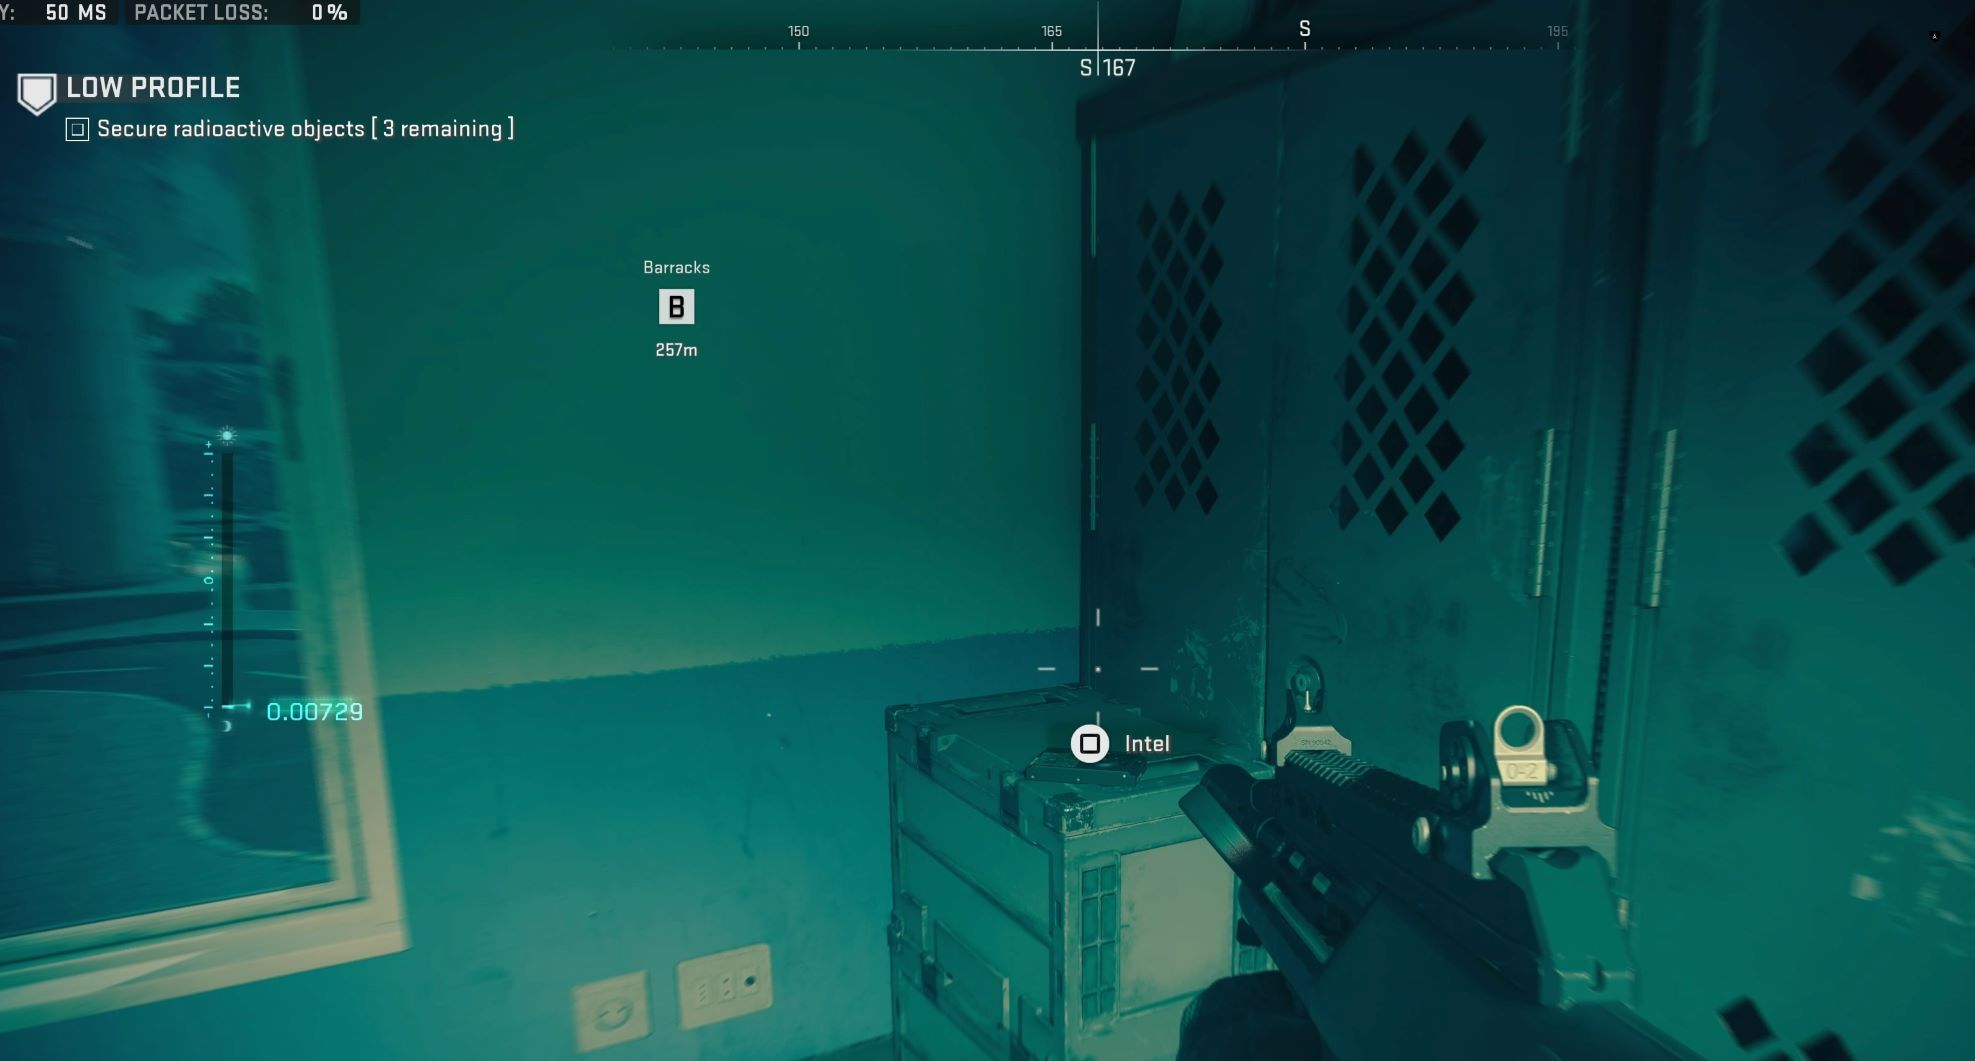
The first Intel location is near Target Site B, which is the target marked on the map. You’ll find an Intel USB Stick on a table inside a three-domed building.
Intel #2
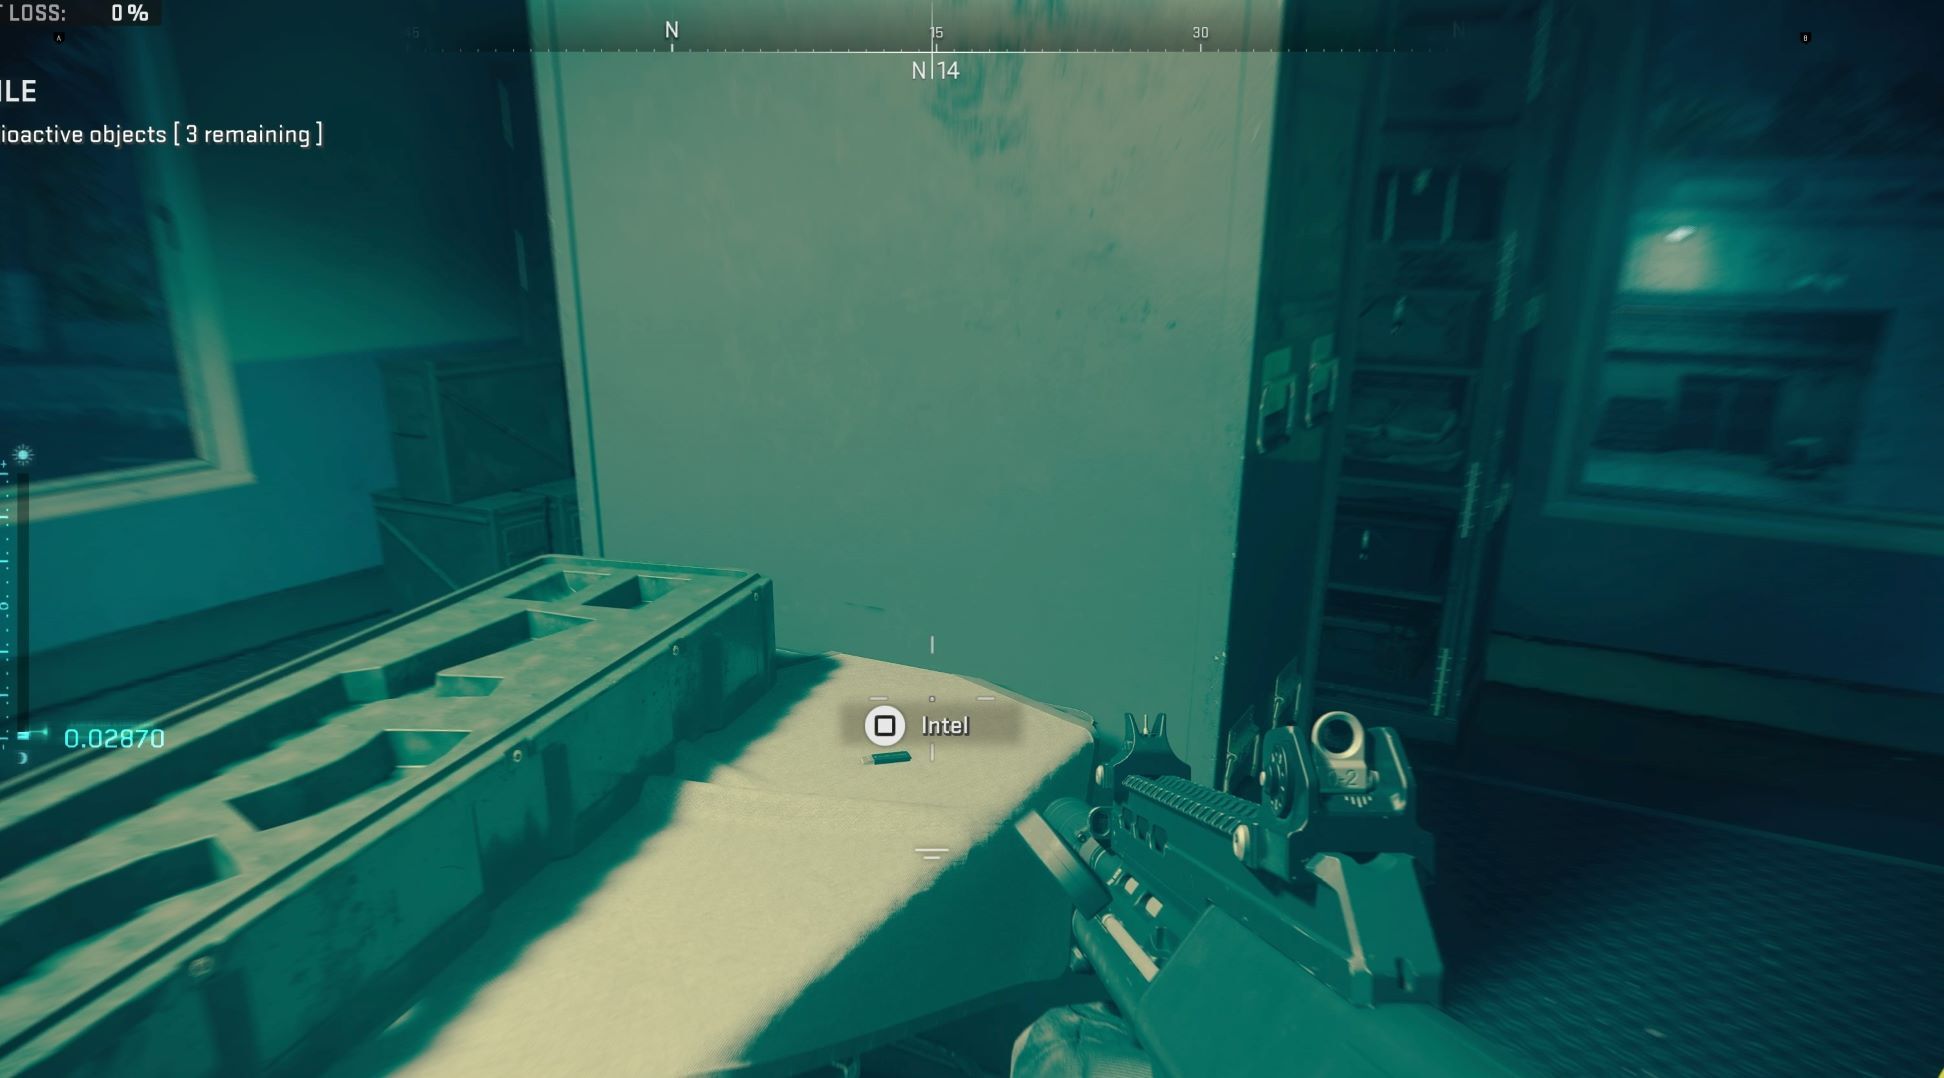
Now you’ll want to go to the roof of the same building as the first piece of information, where you’ll find the second a crate on the rooftop.
Intel #3

Intel’s third location is another bin, found on the rooftop of a building just north of the previous one. You can easily access the roof by climbing an outside ladder on the side of the building.
Intel #4

You will now want to cross the bridge located near the west side of the map. This is the closest to the Goal C Page of the goal. In the middle of the bridge you will find a white truck with a fourth information dropped inside. Here is another box. Beware of Juggernaut enemies lurking nearby with a shotgun. If your stealth is successful and no nearby minions are alerted, you can get this piece without activating Juggernaut to pursue you.
Intel # 5
Move just over the bridge, you’ll want to go to the second building on the left. This is a quirky, cog-shaped structure arranged with a large antenna on the roof. Information is a USB stick found on the first floor. It’s on the table with a computer.
Intel # 6
You don’t have to go far to find the sixth piece of information, as it is another USB stick inside the same building and floor as the fifth location. Move towards the stairs leading to the second floor, and you’ll see the USB plugged into the laptop on the table with two radios.
Intel # 7
Stay in the same building, go up to the second floor to find the seventh information, it’s an audio recording lying on the desk with some documents.
Intel # 8
Now go back to the building just south of the last building. (First building on the left across the bridge) The fifth information is found inside the first building on the left. You’ll find the audio log entry on the top of the cabinet in the kitchen.
Intel # 9
The ninth piece was found on the second floor of the same building as the eighth. Once on the second level, look for a room with a laptop. Intel is a USB stick that is plugged into a laptop.
Intel # 10
Stay where you are when you find the last piece, go to the next room to find the tenth piece is a recording on the bedside table.
Intel # 11

To collect this eleventh piece, you need to first obtain the Table Key from the same room as the tenth piece. This key is at the top of the board. Take the Table Key and return to the previous building. There is a locked desk drawer on the first floor. Unlock it to collect and collect directory information pieces.
Intel # 12
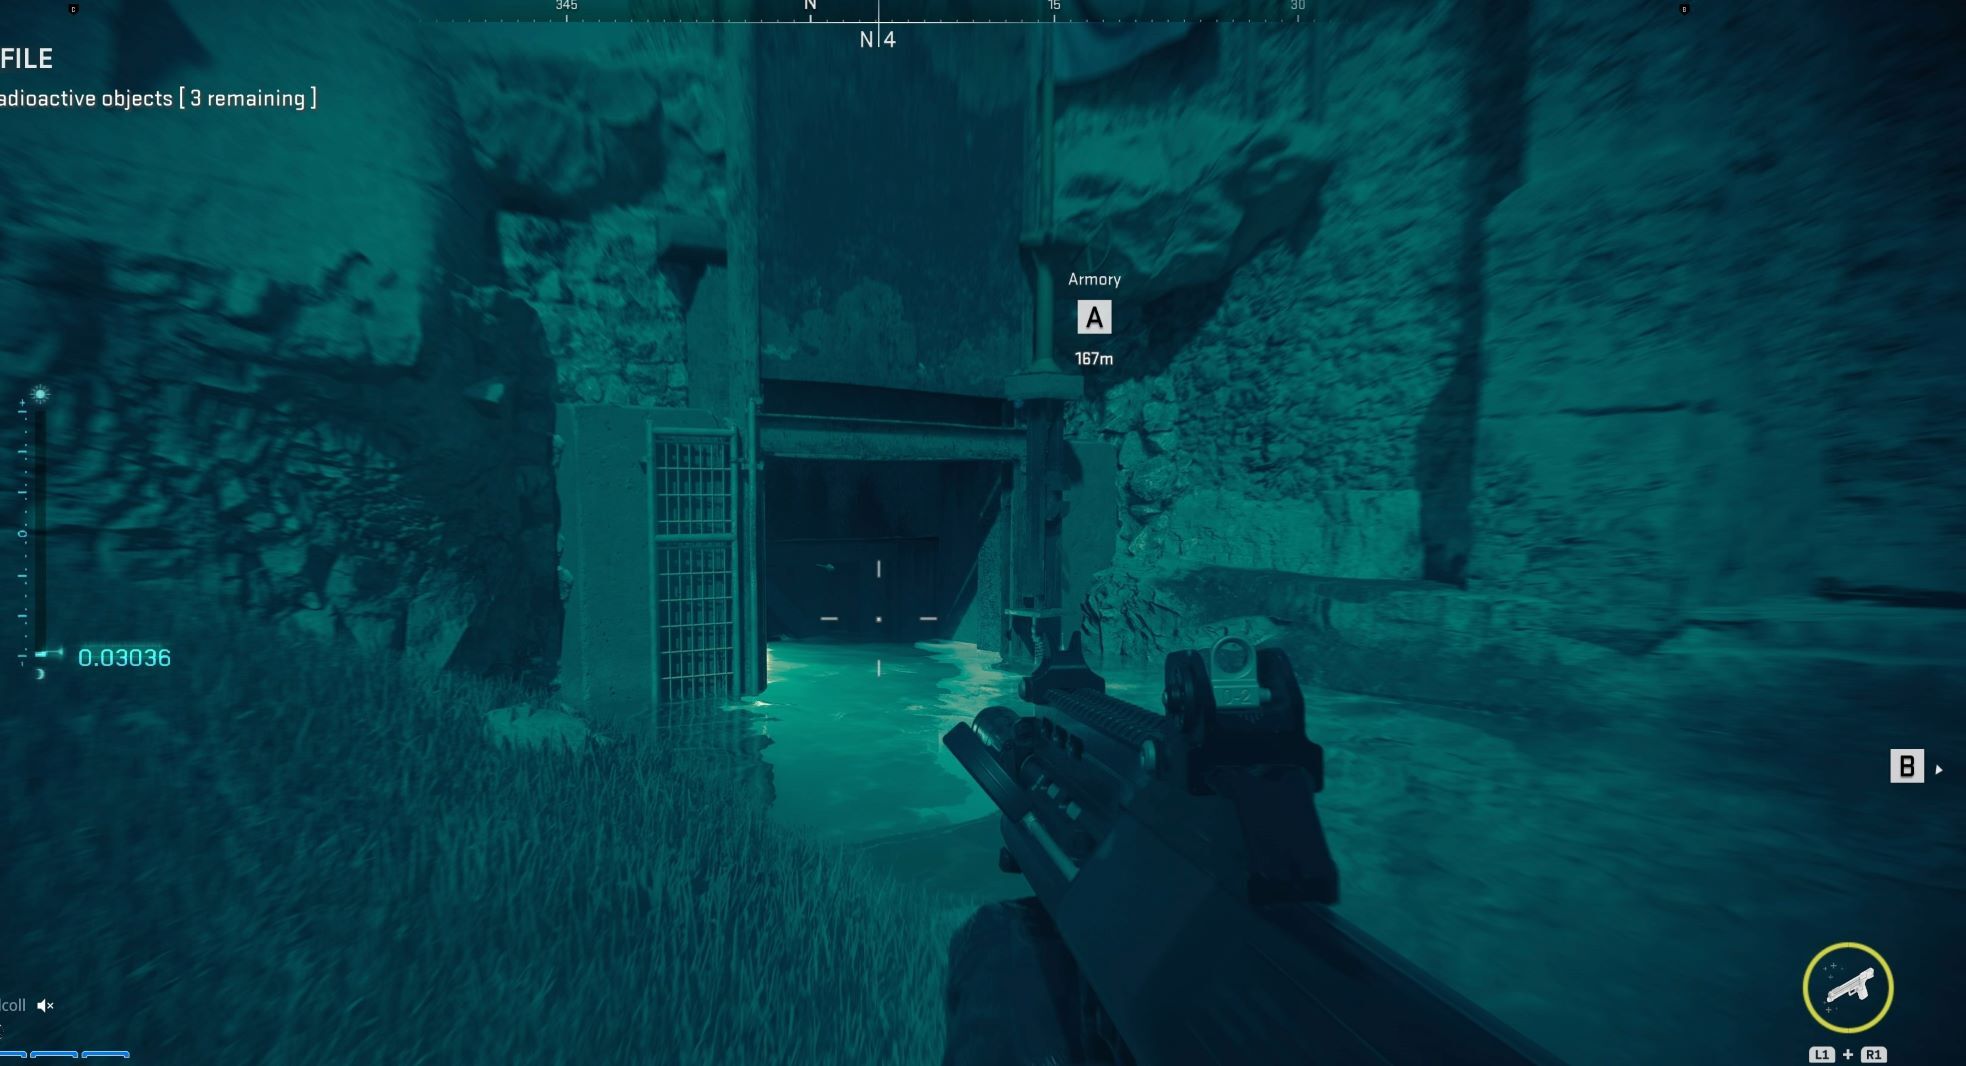
The twelfth part is a bit sneaky, because it’s actually underwater near the island. This is found by going to the smaller bridge located in the middle of the map. From the small bridge you’ll need to jump into the water and swim west until you find a large square nestled between some rocks. There is a piece of information about the barrel in the water here. You don’t have to dive too long to find it.
Intel # 13

The Intel 13 is also found underwater, but you’ll need to go further from the last piece to the small nearby island. You will find a small underwater cave on the island, near the right side of a large building. Information about the barrel found underwater inside the cave. You can easily spot this if you’re familiar with Modern Warfare 2’s Hydro Hydro multiplayer map. It’s a puddle near the dominating point B. You’ll see the barrel just by looking down at the water here.
Intel # 14

Next, head north from the island to find the fourteenth piece. You will find information about the barrel on the roof of a building located just north of the small island.
Intel # 15
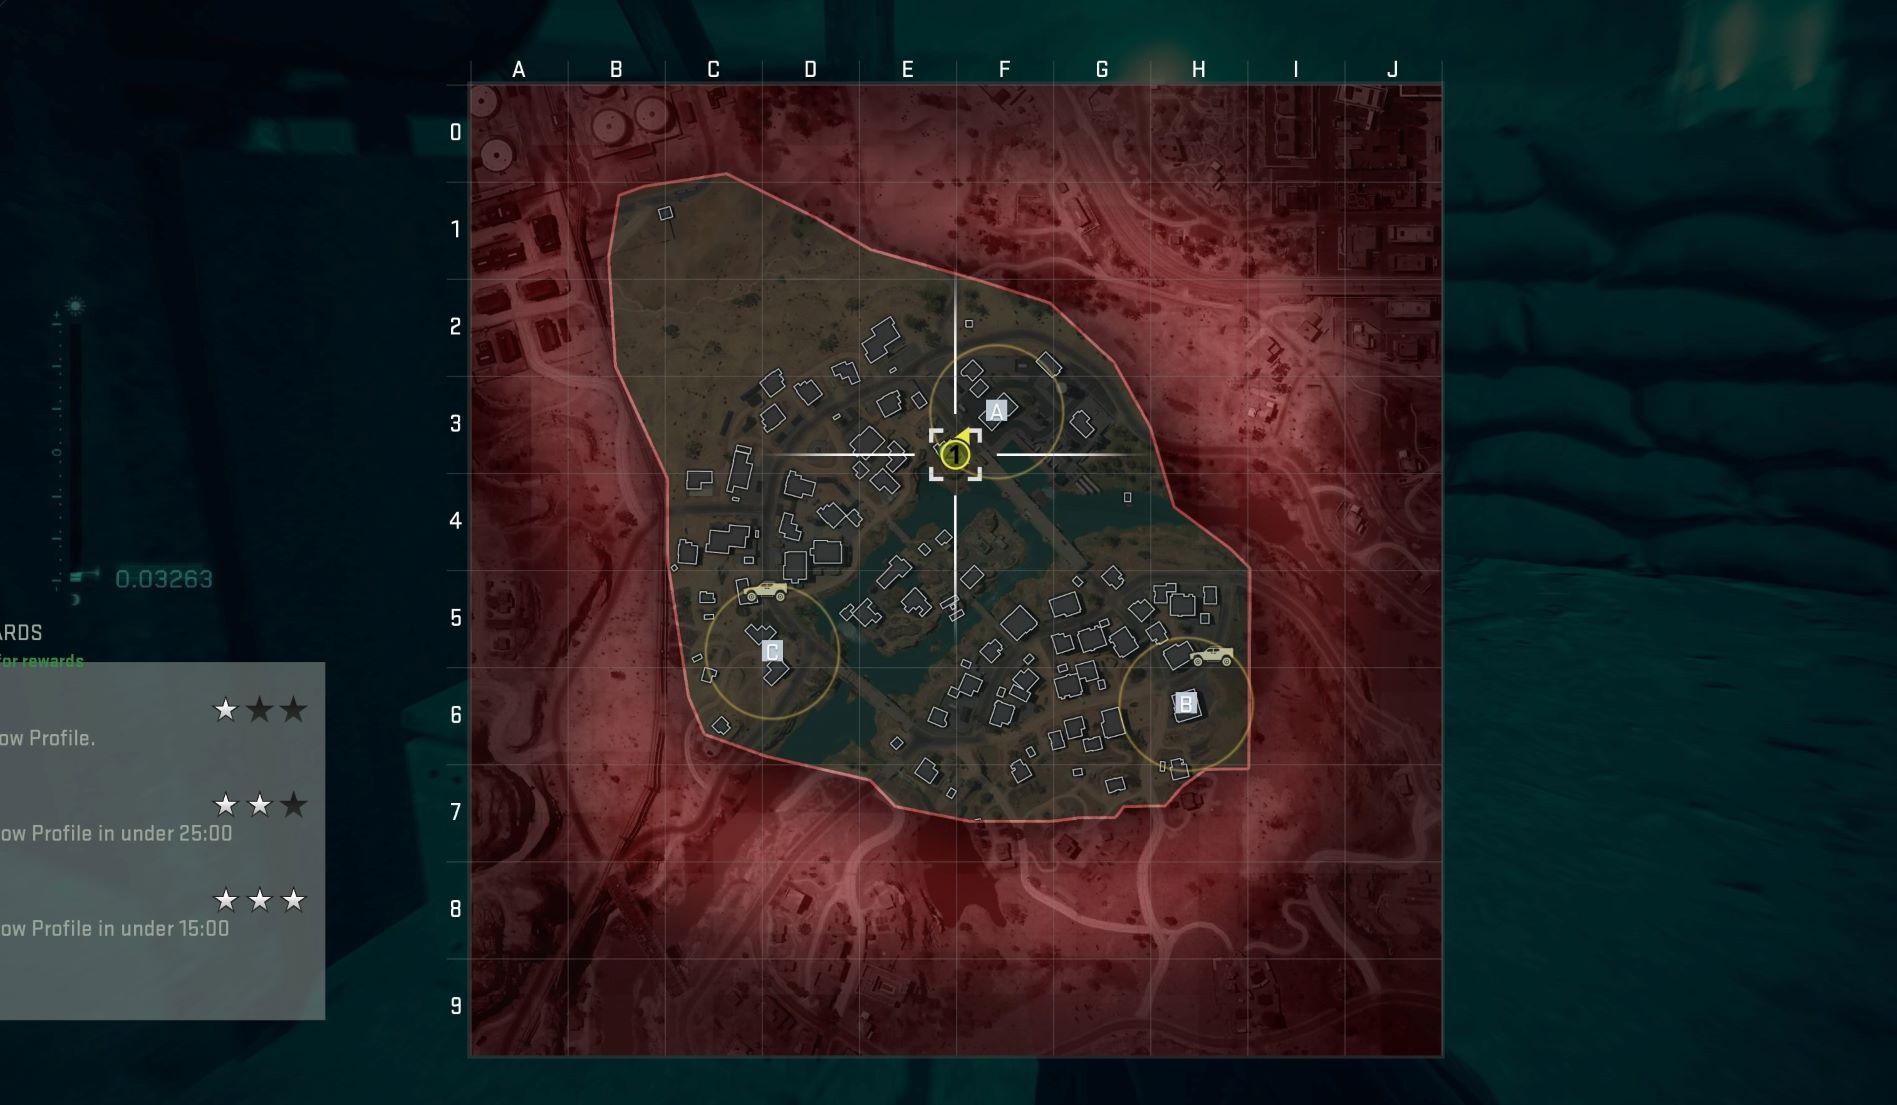
Now, you want to head towards A Target Site to find the building located right next to the bridge from B to A. The fifteenth piece is a crate found on the roof of the building to the left of the street.
Intel # 16
These next three pieces of information are all found inside the A Target building, which requires you to disable all traps before you can gather information. Tripping any trap will instantly drop you, so move carefully through the building and neutralize each trap.
The sixteenth piece is a USB on the first floor of building A. This USB was found on a table in a room with an empty weapon case and a lot of ammo scattered around.
Intel # 17
The seventeenth is an audio record located in the next room where you found the sixteenth piece. Information was found on a box by the window and several lockers.
Intel # 18

You’ll find the eighteenth piece that asks you to move up to the second floor of building A. This is a recording placed on the foyer table near some vending machines.
Intel # 19

The nineteenth piece is located outside against a wall closest to the northernmost buildings on the map. This is a crate on the ground. It shouldn’t be too hard to spot, but if you’re struggling with night map visibility, make sure to use your night vision goggles here.
Intel # 20

The final information is not easily accessible. First, you’ll want to climb to the top of the tall radio tower located near A Target Site. From the top of the tower, parachute towards the tower found on the small island. Intelligence is a crate on the rooftop.
Alternatively, you can try this when you first enter the mission by parachuting to this rooftop first. Otherwise, you will need to climb up to reach this roof. I saved this for last.
If you want to get the most out of the campaign, make sure to watch Instructions for all locations and unlock codes for Modern Warfare 2’s safes. We also offer some Modern Warfare 2 install recommended for use throughout the campaign, MP and Special Operations.
The products discussed here are independently selected by our editors. GameSpot may receive a share of the revenue if you purchase anything contained on our website.


